Water, water, everywhere, a recurring theme

It turns out it was one of the wettest years on record in the Pacific Northwest, and in early February, the water finally breached the house.

Our house is situated at the bottom of a pretty big hill, so we end up seeing quite a bit of water. Here’s the sidewalk in front of our house during one of the longer spells of rain. Continue reading “Water, water, everywhere, a recurring theme”

Heating up (the guest room)

Our latest house project was adding a thermostat and heater to the guest bedroom, which is in the basement and gets pretty chilly in the winter.

There were wires left in the wall from a previous heater that the electricians discovered during their work before we moved in. They put in a 240V circuit to supply those wires, and left them in a junction box in the wall. They had actually run another wire up through the ceiling from that junction box to another one on the other side of the room, where we thought we might actually install the heater, but we did that before we had really laid out the furniture, and it turns out to be in a bad location.

After much searching for a silent, powerful heater – I was hoping there was a 2000W mica panel heater that might fit the bill – we settled on the Home Depot special: a 2000W, 240V ComPak in-wall heater from Cadet. We got one without a built-in thermostat so we could have a thermostat mounted in the junction box, at a more reasonable height. We had to special order a double-pole thermostat because the single-pole ones apparently don’t actually turn completely off, and most of the time the room is unoccupied. (Note that these kinds of heaters require a thermostat that actually switches the line voltage on/off, rather than a typical HVAC system which just uses a low voltage signal to tell your furnace/AC unit to turn on.)

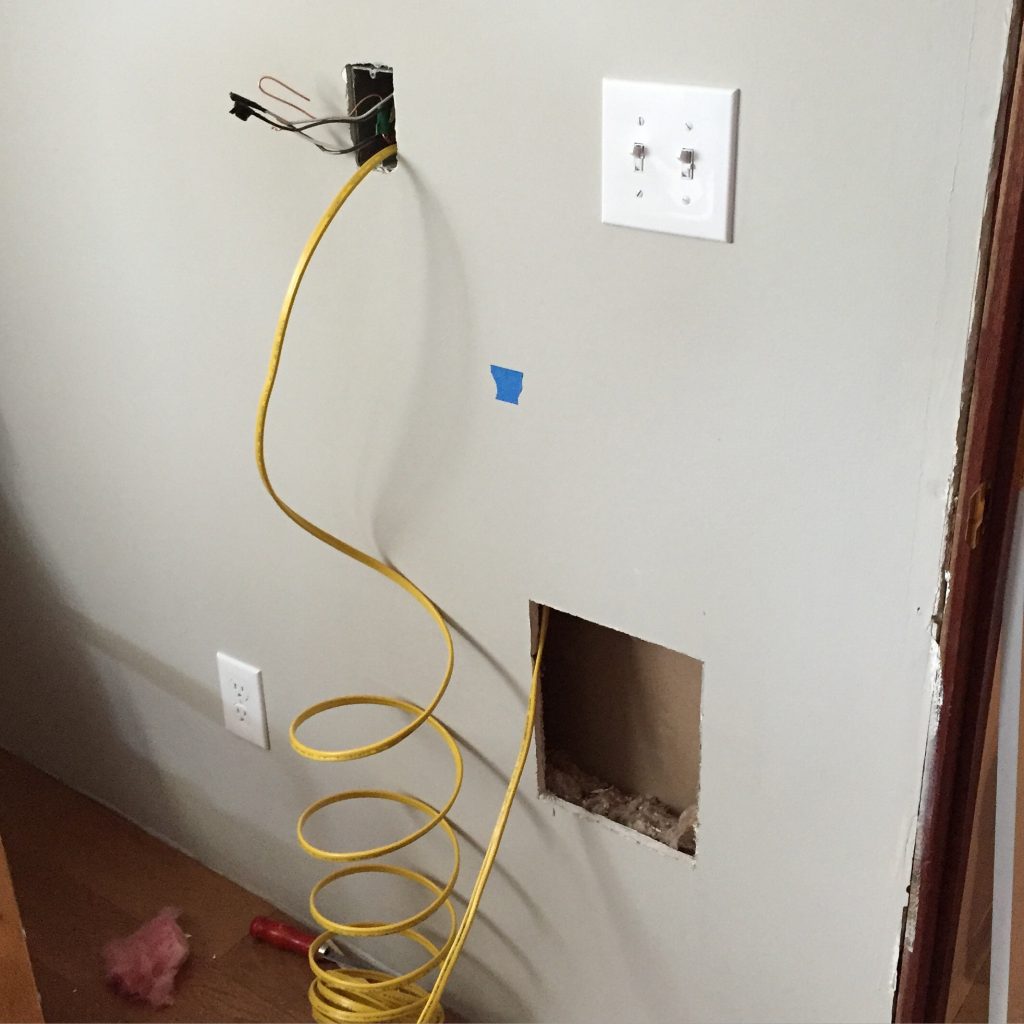
So we followed the instructions, marked out a location for the heater on the drywall, and got cutting.

img_7520.jpg

The right side of the opening is up against a stud, and the junction box (visible in the top left of the above photo) is actually in the next stud bay over. So we had to drill a hole in the intervening stud and route some wires from the box to the heater location.

As Dina accurately put it: if you need to manipulate things in a tight space where you can’t see, ask an Ob/Gyn for help! Indeed, she was up to the task.

img_7519.jpg

From there, we wired up the thermostat and the heater, per instructions, and we were in business!

img_7518.jpg

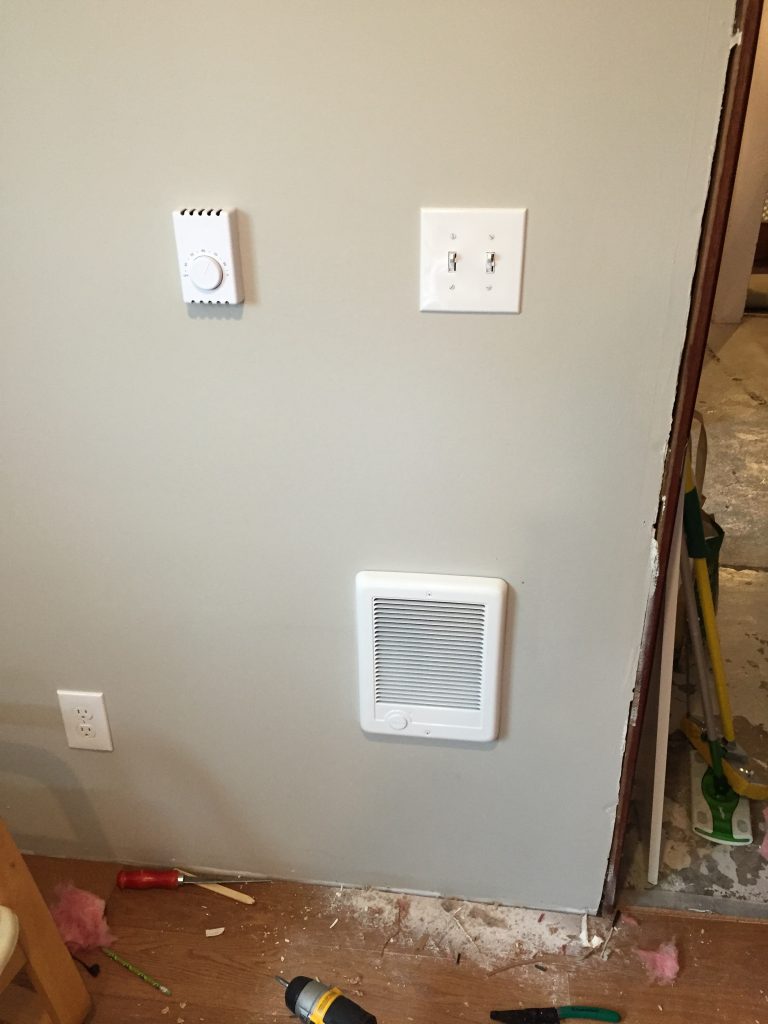
It’s now warm & cozy in the guest bedroom, so come and visit us, any time of year!

A few fewer trees

It wasn’t our top priority, but from day one, we knew we’d have to do something about some of the trees around the house.

img_6243.jpg

As you can see, it was a bit of a jungle out front. That blue cedar is growing about a foot from the front porch and has the potential to get 60 feet tall or higher; the one that looks kinda muppet-ish on the right turns out to be a weeping cherry whose rootstock took over.

And the side yard wasn’t much better, what with the palm tree (!) somehow growing on the north side of the house. In addition to finding it pretty ugly, we were dismayed to discover it also housed a colony of ants, and provided a bridge for them to get into our house. It had to go!

So we hired Out on a Limb to take care of business, and they did a great job. Both our dining and living rooms get tons more light now.


And you can actually see the house from the street!

Not that long after, our neighbors arranged to take out the huge laurel hedge that ran the property line between our houses. While the roots were on “their side” of the line, the hedge paid no heed to such boundaries. It grew to 10 or 12 feet deep in some spots. We were pretty happy to hear that the neighbors wanted it gone. Here’s the view from the street before:

img_7245.jpg

And from our back door:

img_7244.jpg

The wood chipper got quite a workout! I think the crew filled two small dump trucks with the hedge alone, and then came back the next day to grind out the stumps.

img_7247.jpg

The “after” shots:

img_7268.jpg

img_7270.jpg

We estimate we reclaimed 400-500 square feet of yard out of the deal. It’s a little jarring still, to see through to other houses, get light from streetlights, and so on. But overall, we’re quite happy with the extra space (did someone say chickens?), and we’ll be coordinating with the neighbors to build a privacy fence (did someone say trellis with wisteria?).

Up next is the garage roof. Never a dull moment!

Growing

When we moved the strawberries to the bed by the side of the house in early June, we got some surprise tag-alongs.

We don’t know if that bed had a bunch of squash or pumpkin seeds already there, or if they arrived with the compost we put down, but either way, we wound up with a bunch of squash vines intermixed with the strawberries.

Continue reading “Growing”

Lighting the Way

I hadn’t quite pieced together when we initially hired the electricians to rewire the house that many of the light fixtures would need replacing. The contractors did put up minimal lighting (i.e. wires with a socket and a bulb), but we hadn’t picked out new fixtures in time for them to be professionally installed.

So as we picked up lamps, I installed them around the house. Continue reading “Lighting the Way”

Lead up to the Move-in!

There was a flurry of activity in the house during and after our big trip. While we were away, the electricians installed a new panel and rewired most of the house. The old panel was made by Zinsco, and the breakers are notorious for not tripping when they’re supposed to. Much of the wiring in the house was knob and tube, some of it modified (in a bad way). In addition, the old service wire that provided electricity to the house was pulling away from its anchor, and crossed over our neighbor’s backyard. All in all, not good. Continue reading “Lead up to the Move-in!”